We’ve all returned from a trip and been a little disappointed with how our photos turned out. It happens to us frequently. While quality of equipment helps, taking a great photo can be achieved on any camera. All it takes is a careful look to make sure what you want is in the frame. Lighting can be tricky, but that is where apps like Snapseed can help you share better photos on social media.
Another tool to consider is Adobe Express, which offers easy-to-use features for enhancing and adding creative effects to your photos. Be sure to do some research and click for info to discover how this tool can make your travel memories shine. Whether you’re adjusting brightness or adding filters, Adobe Express gives you the flexibility to polish your shots and create professional-looking images effortlessly.
I’m going to show you how to take mediocre and bad photos and turn them something a little more special using Snapseed, which is free. Snapseed is what we frequently use to edit photos before posting them on our Instagram accounts, wanderlustmarriage and travel guide_alex. Try out these tips to help post better photos on social media!
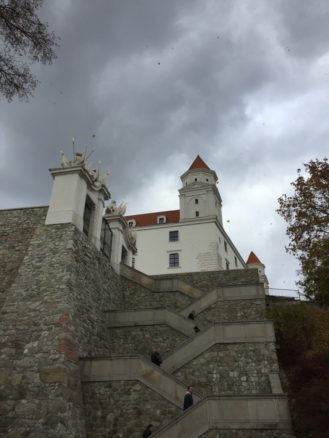
These are the steps up to Bratislava Castle in Slovakia. I liked the symmetry and snapped this on my iPhone 6. But the colors are not very interesting, and it doesn’t fully capture how cool looking this was.
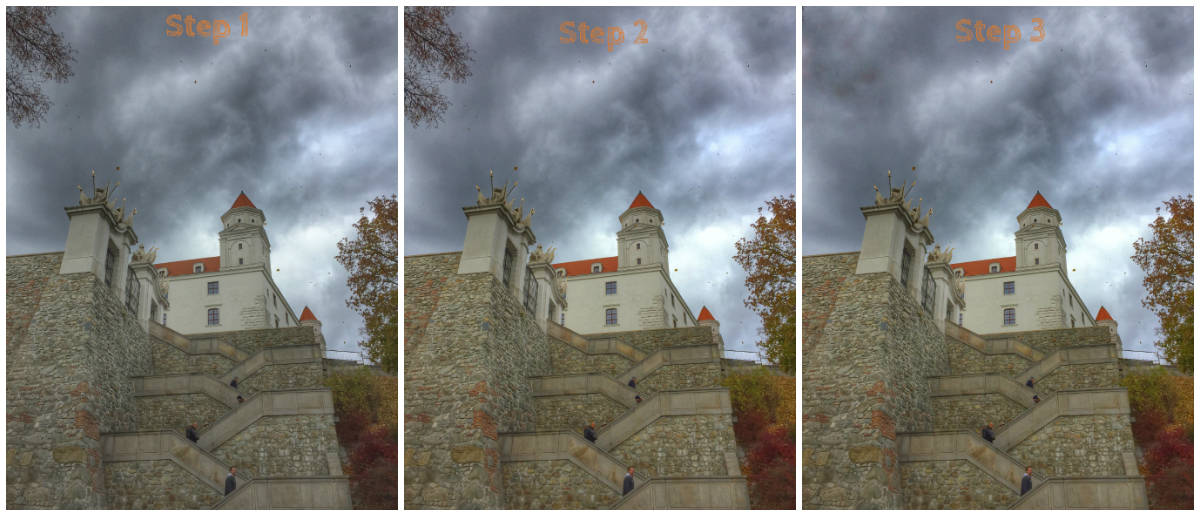
HDR Scape: One Simple Click to Enhance Photos
Step 1. Choose HDR scape. Then click on the cards icon at the bottom of the screen. Choose fine and slide your finger across the screen, adjusting to having more or less of the enhanced effect. For this photo, I went with 35. The HDR scape setting initially loads at 50, but sometimes that looks a little too cartoonish.
Step 2. Choose Tune image. Then scroll up or down with your finger to choose the saturation option. I set this to 40 by swiping across the screen to the right. Then I chose the highlights option and set it at 25.
Step 3. Choose Healing. I didn’t like that bit of tree in the top left corner. So I swiped a little over the tree with my finger. After a few times, the tree was removed. You can zoom to edit the finer details of removing unwanted pieces of a photo.
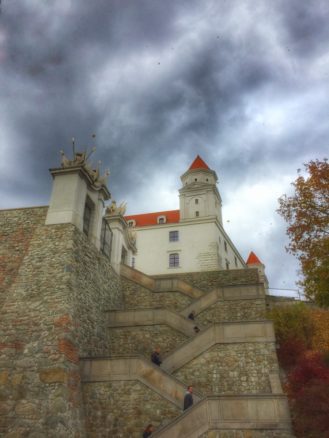
Step 4. Choose Glamour Glow. On the card on the bottom, choose option 3. I brought it down to 50 by swiping to the left. And voila, we also used the finished product in our article, Is Bratislava Worth a Day Trip from Vienna?
Color Splash: How to Use Snapseed to Edit Photos
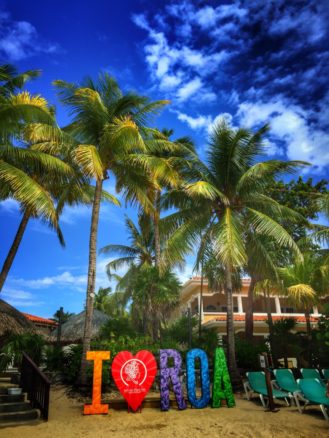
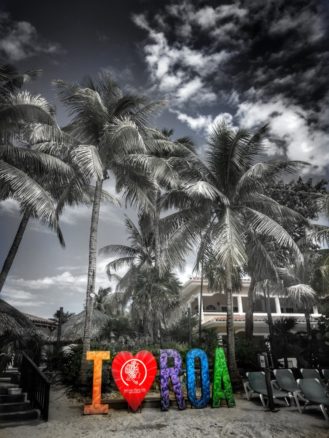
Want a color splash? There are dedicated apps out there for that, but this can also be done right in Snapseed. Below is a picture of the beautiful island of Roatan in Honduras, when we visited on a 7 day Caribbean cruise last year.
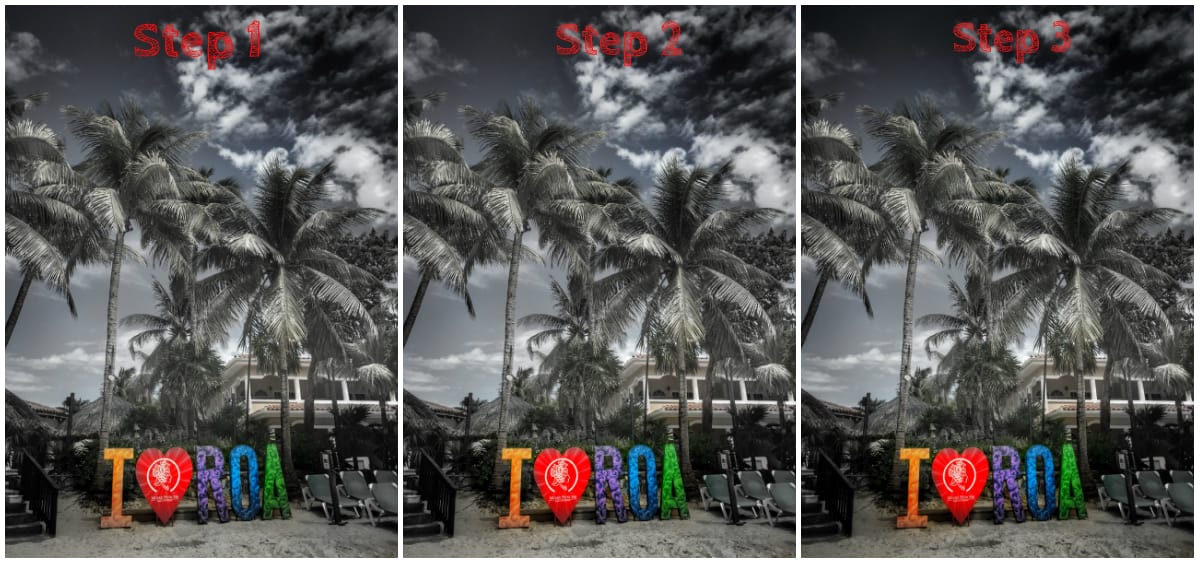
Step 1. Choose Brush and select the saturation brush. You want to set that to -10. With your finger highlight over the areas you want to de-saturated. You can zoom in to get into small spaces by pinching the screen. You will need to go over it several times to get it to be black and white. I left a wee little color here.
Step 2. Choose Selective, and tap where you want to magnify the color and then pull down to the 1st S for saturate and swipe to the right to make the color brighter where you need to.
Step 3. Choose Vignette, and I set the outer brightness to -40 by swiping to the left
Step 4. Choose Tune image, and pull down to select highlights and swipe to the right set it at +40.
How to Enhance Lighting Using Snapseed
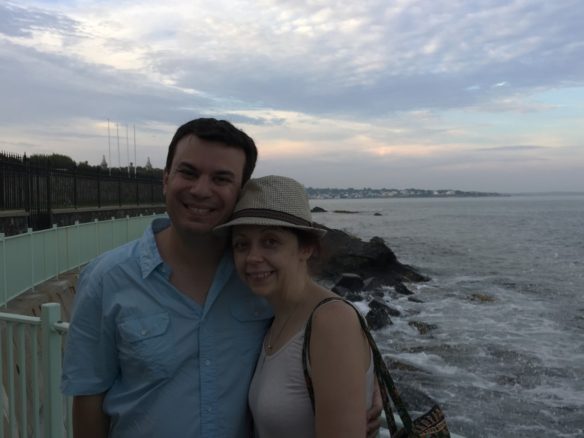
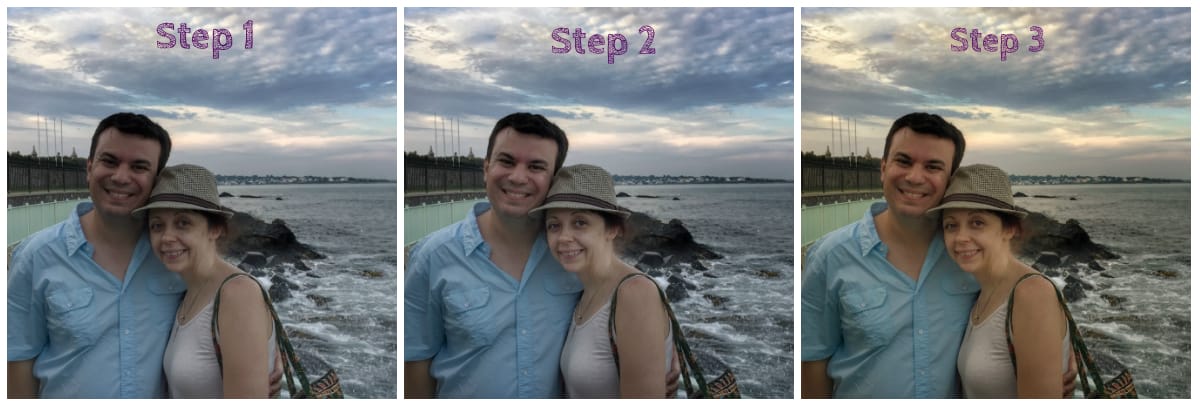
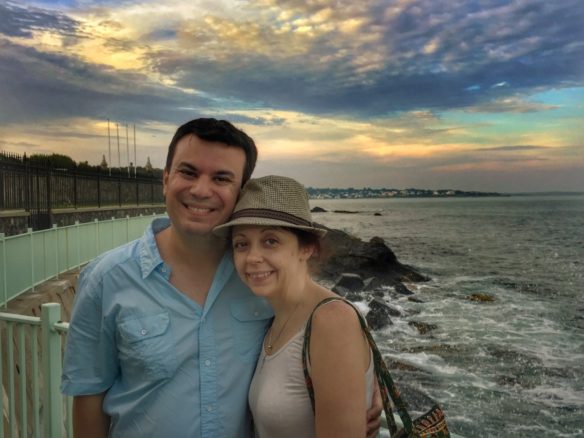
Balancing the light on people and details in the background can be tricky, but there are ways to fix this problem on Snapseed. This is a photo of us in Newport, Rhode Island, with terrible lighting. Here’s how to transform it into something worth posting on social media:
Step 1. Choose HDR scape. Tap on the cards at the bottom and select the people option. I swiped to the right and set it at 40.
Step 2. Choose Enhance. Tap on the cards at the bottom and select Spotlight 2. I swiped to the left and set spotlight at 50, then pull down and select skin smoothing and set that at 15
Step 3. Choose Tune image. Pull down and select warmth, then swipe to the right and set at +32. Swipe down again and select saturation and swipe to the right and set at +20.
Step 4. Choose Brush. Select the saturation brush at +10 and paint in more saturation over the sky, then select the dodge brush and using the arrows, set at -5 and brush over the sky again to get the clouds a little darker. What a difference!
Major Enhancement of Mediocre Photos
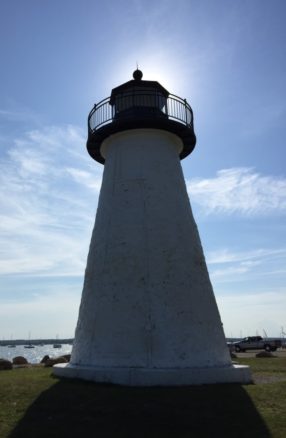
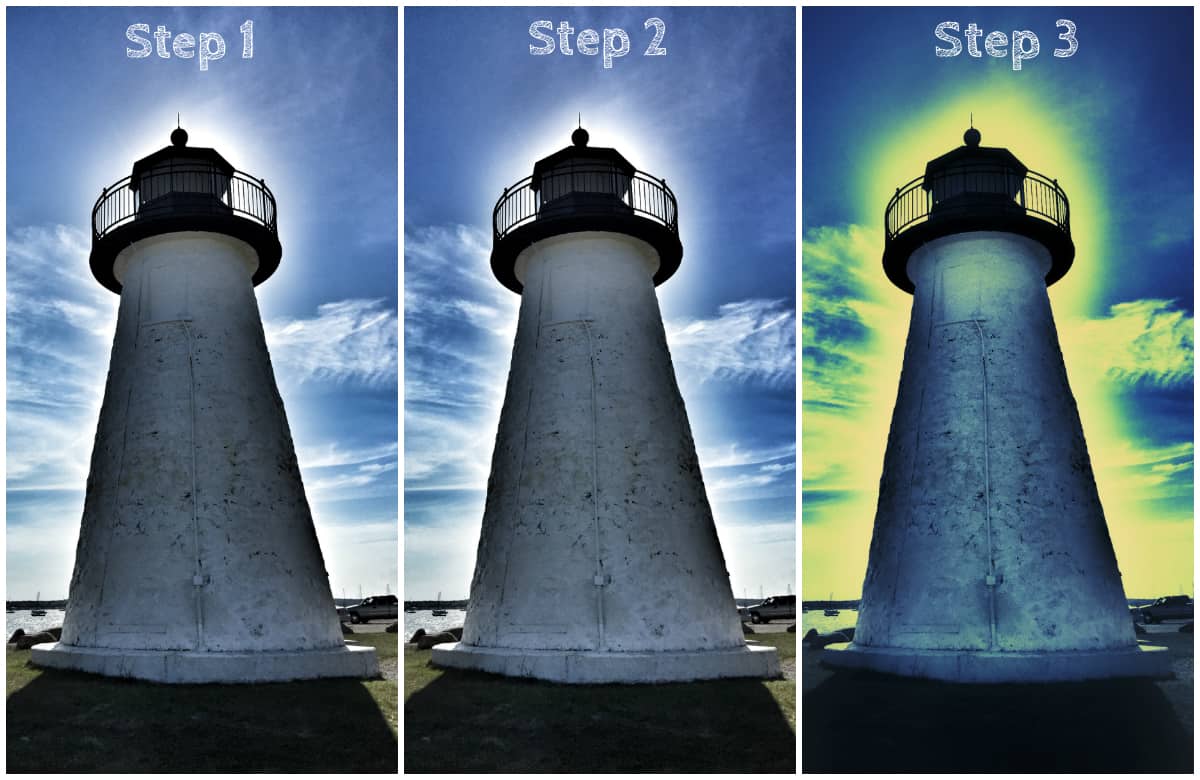
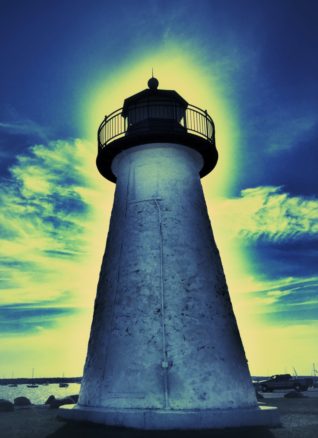
Finally, this one is for fun. I like to play with the more extreme effects from time to time. With snapseed you can use it to “fix” your photos, but you can also use it to create some cool artistic effects. Below is a lovely lighthouse in New England.
Step 1. Choose Drama. Then select Drama 2 and swipe to the left to set at 75
Step 2. Choose Brush. Select Exposure and set at +0.3 and with your finger paint over the body of the light house. Then change the brush to dodge, set at -5 and pain over the blue sky.
Step 3 Select Grunge. Swipe down to Texture strength and swipe to the left to set at 0, next swipe up to select Style and swipe to the right to get to style 1172.
Step 4 Select Crop and resize to crop that shadowy flat grass out of the photo. While we wouldn’t typically use this in a blog post (outside this one), it’s fun to occasionally post something like this on Instagram.
Growing a social media account like Instagram is a great way to reach more potential clients or customers. So try out these tips if you’re looking to grow your account! Here are some additional photography tips to check out.
Need further assistance with editing tips to share better photos on social media? Feel free to shoot us a question or leave a comment. And if you need help promoting your brand, get in touch. We have around 70,000 followers on social media between our Instagram, Twitter and Facebook accounts!


 Romantic Places to Travel for Christmas
 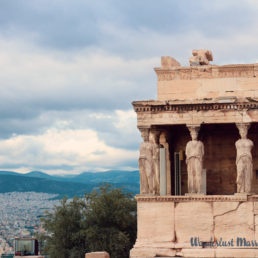 Great Tips for Visiting Athens
use the NOISE CLEANUP from ASHAMPOO PHOTO COMMANDER to clear up the whole image then PICASA to correct the exposure then FOTOR to add FILTERS.
Thanks for sharing your tips, Wally. We’ll look into this.
Hi there, Bell! Snapseed is not as good as Luminar! Check out this article to compare! Hope you will find it useful.
Hi Melissa. We’re unfamiliar with Luminar, but Snapseed is free while Luminar is $69 for the package, according to your article.